Growing coneflowers in your garden is a pleasure. Their flowers are some of the happiest around. The plant is generally both low maintenance and easy to grow for even the most novice of gardeners. I love to see coneflowers planted in masses along a sunny border, but the uses for coneflowers are endless. You can even plant coneflowers in containers for the season and plant them in the ground in your gardens in the fall.
The low maintenance aspect of these plants does not stop with their daily maintenance. Even transplanting coneflowers is easy. However, having some good tips on when and how to transplant your coneflowers will only set you up for greater success.
Whether you are transplanting a mature coneflower from one space in your yard to another or if you are planting right out of a nursery pot, these tips will work for you!
When to Transplant
Two times are best for transplanting your coneflowers, spring or fall. This is because the temperatures are cooler, but the soil is workable.
Spring

If you are planning on digging up some coneflowers from one part of your yard and moving them to another, this might be a little tricky in the spring.
You will want to wait for the plant to leaf out before you move anything. However, if you have just made a trip to the garden center and purchased some potted coneflower plants, spring is the best time to get these plants in the ground.
Coneflowers have long tap roots. Envision a carrot from which the smaller fibrous roots grow. These roots do best when they have a bit more time in the ground and can spread their roots for a longer period of time before the ground freezes. These deep root systems are what allow coneflowers to tolerate some drought in the blazing heat of the summer.
Fall

Autumn is a great time to move plants around your garden. You typically know where your plants are and, more importantly, where you want to move them.
If you are going to move plants around in the fall, be aware of your frost dates and make sure your plant has a few weeks in its new home before the ground freezes and the uptake of water becomes limited.
Fall is also a great time to divide your plants. You will want to divide your coneflowers when they are close to dormancy, and this is best done as late in the fall as possible.
Not Summer

Summer is not usually recommended for any planting. The heat and lack of water can set your plants up for transplant shock, which can result in losing your plant if you are not careful.
That said, if you have a cool stretch or maybe a rainier summer than usual, you can give transplanting a try. You will want to keep an eye on your newly planted coneflower, though.
Maintaining moisture is crucial at this point. If you transplant your coneflowers in the summer, you may want to deadhead the plant completely and rule out flowers for the remainder of the season. This allows the plant to focus on growing roots. It will also form your coneflower into a nice mounded shape that will be easily transported from one point to another.
How to Transplant
Now that you know when to transplant coneflowers, it’s time to learn the proper steps to do it so your coneflowers will grow well this season and many to come.
Step 1: Find The Right Location

Before you dig your coneflower out of the ground, scout your yard for the perfect new home for your plant. Coneflowers love full sun and soil that is well draining.
Coneflowers pair well with most sun-loving perennials. I have coneflowers planted with Black-eyed Susans and perennial salvia.
I like the similarities of the daisy-like flowers of the Black-eyed Susans but also the spiked flowers of the saliva. Planting coneflowers in masses is beautiful, and it allows for some self-seeding and an even less maintenance area of your garden.
Step 2: Start Digging

If possible, dig your new hole before popping the old plant out of the ground. This will help to eliminate any transplant shock. This is easier said than done since you may not know the size of the root ball you will be digging out of the ground.
If you are popping a whole coneflower plant out of the ground, dig carefully and try your best to find the tap root. A tap root is a long single root that all of the smaller fibrous roots develop off of. It is typically long and can grow to five feet deep.
You will want to do your best to avoid chopping the tap root in half. Loosen the soil around the roots until you feel the plant will easily come out of the ground. Coneflowers are perennials with deep root systems; the more time they have in the ground, the better.
Whether you are planting a newly purchased plant or moving coneflowers around your garden, you will want to dig a hole a bit wider and deeper than the plant’s root ball. Loosen the soil up with your shovel to allow the roots of the coneflower to grow and settle into its new home without too much resistance.
Step 3: Prune

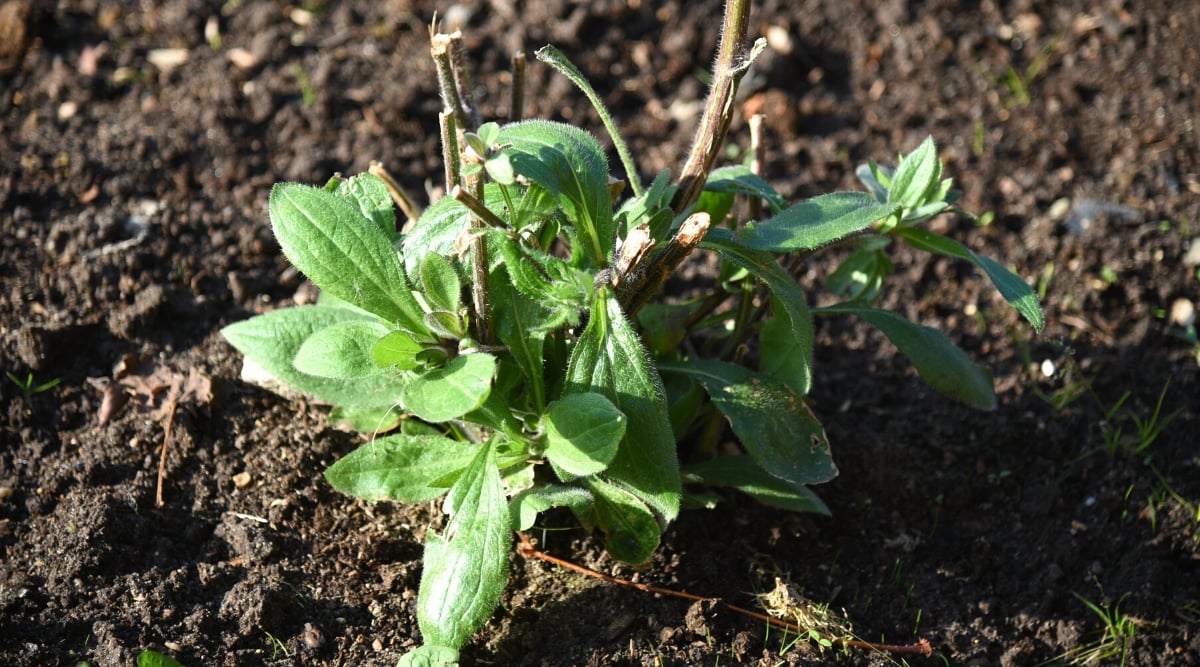
Once your plant is happily in the ground, consider trimming the flower stems down to the ground. This is not 100% necessary, but it will keep your plant looking neat. You can also keep a better eye on the plant’s leaves.
Step 4: Water

Keep watering your plant until the ground freezes. Coneflowers do best with one inch of water per week. These drought-tolerant pollinator plants may not need as much water as others, but this is not the time to skimp on watering.
If you notice the leaves of your coneflower drooping, it is time to water them. This heavy watering schedule will fade after the coneflowers grow for a year or two in your garden. This will give the perennial plenty of time to establish its roots in your soil.
Step 5: Fertilize as Needed

If you are transplanting your coneflowers in the spring, you could give them an extremely light dose of fertilizer after they have been thoroughly watered. Don’t apply fertilizer to dry plants, and avoid a heavy hand as excess fertilizing risks damaging the plant’s roots.
If you want to give your plants a nutrition boost without the risk of burn, I would suggest adding some compost to the top of the soil around the plant. Many brands of compost are available at garden centers and are full of the nutrients your coneflowers need to survive.
Add an inch or so of compost around the base of the plant. Your plants will flourish while your soil structure will improve due to the addition of organic matter.
Final Thoughts
Once you have successfully transplanted your coneflowers, it is time to sit back, relax and enjoy these simple beauties. Keep them watered and deadhead them, and you will reap the benefits of having coneflowers bloom all summer long in your garden.


