
New to gardening and wondering how to start seeds? Maybe you’re someone who thinks you just don’t have a green thumb. Maybe you killed the last few plants that you just glanced at.
Have no fear…Epic Gardening is here!
I was just like you. In fact, I only started gardening about two years ago, so I’m still pretty new to it all. Prior to that, the last thing I grew was grass for a fourth grade science project…and let’s just say I didn’t get an A on that project ;)
When getting into gardening, it’s best to take it in small steps. The first thing you need to do is learn how to start seeds indoors. It’s December right now, so in most parts of the United States and the world it’s too cold to start your seeds outdoors.
Step One: What You Need
Seeds
What do you want to plant? If you haven’t gardened, you might want to ask yourself what types of plants you enjoy eating. I made the mistake of planting exotic and crazy plants that really didn’t taste good to me, so I ended up not eating them. I like growing things that I can eat, so I quickly switched to some more tasty plants.
One thing to consider is your climate and the time of the year. Both have a big impact on what you can grow and how well it will do.
What’s that?! You don’t know your climate zone?! No problem. Here’s a link that will tell you what “Hardiness Zone” you live in. Plug in your zip code and it will spit out a zone. Take that zone and Google “Planting Dates in Zone (your zone)” and there will be a link to all the different types of plants that will thrive in your climate and time of year. Pick the ones that you like to eat and purchase some seeds at the local nursery or online.
Tray
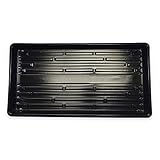
- Quantity 10 - Durable Plastic - NO Drain Holes
- Perfect for use as a drip tray, hydroponic growing...
- Approx: 21" by 11" (top measurement). 20" by 10"...
You’ll want a tray to hold your seeds and growing media. The best one is the simplest: a 10 x 20 black propagation tray that can be found on Amazon for a few dollars.
Media
Your seeds need to be placed in some type of growing media if they’re going to germinate properly. I’ve gone over growing media here, but if you want a quick and easy recommendation I would go with a bag of seedling mix from your local nursery.
Humidity Dome
Most plants require warm soil and high humidity to germinate properly. A humidity dome goes on top of your tray to trap air and heat in.
Heat Mat (optional)
To boost the temperature even further, you can get a electronic heat mat. This isn’t necessary, but it does speed up germination for most seeds.
Epic Gardening Recommends
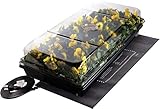
- UL-listed waterproof heat mat, 17 Watts, 120 Volt,...
- 2" humidity dome
- 11" x 22" watertight base tray
Step Two: Preparing the Tray
If you’ve picked up a more traditional seed starting kit, you’ll have a tray with inserts inside to hold pockets of soil. If not, don’t worry – just spread your soil in the tray. In these pictures, I’m using Jiffy expandable pellets. I had to pour some water into my tray and let it sit for a bit so they would expand. (You can speed up the expansion process with hot water, as long as you have time to wait for them to fully cool down afterwards!) After they did, I drained the tray and arranged the pellets.


Step Three: Planting the Seeds
Now that you have your tray prepared, it’s time to get to planting! Make a slight depression in each of your Jiffy pellets or other growing media. If you’re just using a tray of soil, poke a finger into the soil about 1/4th of an inch deep.
Next, take two or three of each seed and place them in each hole. Cover them up with a little bit of soil. Keep planting until you’re finished!
Why More Than One Seed? Sometimes a seed just won’t sprout, so it’s good to add a few more to make sure that at least one sprouts. You can clip off the weaker ones if more than one sprouts!
Final Tip: Make sure to write down the types of seeds that you’ve planted so you can keep track of them once they sprout!
Step Four: Germination Conditions
All you need to do now is pop on your humidity dome and place the tray in an area that gets a modest amount of sun. If you bought a seedling heating mat, plug it in and put your tray right on top.
Some Things To Remember
- Read your seed packets to get an idea of how long it will take for your seeds to sprout.
- If your soil gets dry, mist it with a spray bottle.
- Label your seeds and keep a garden journal!
That’s it! You’re off to the races now…be patient and let these bad boys sprout :) I’ll cover the next phase of growing soon!


